Machine Applied Faux Piped or Flanged Binding
I want to share a great technique for creating a binding that you can apply by machine on both sides that has a very professional finish. By changing the widths of your binding strips, you can finish with a piped or flanged binding. In this tutorial, I will be showing piped binding. Check the end of this blog for other widths you can use with different results.
Piped Binding
For binding where you'd usually cut a 2 1/4" wide strip:
cut strips of your bind color 1 1/4" wide x WOF (purple here)
cut strips of your piping color 1 1/2" wide x WOF (white here)
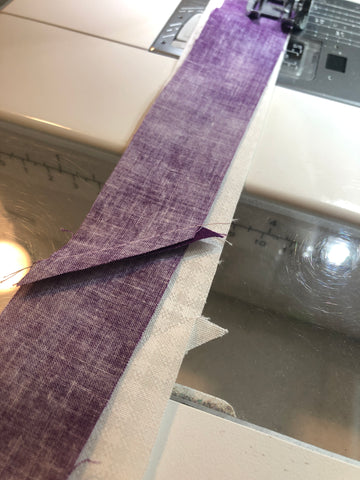
Cut 45 degree angles on the ends of all strips.

Sew bind strips together, end to end, right sides together with a 1/4" seam.
Sew piping strips together, end to end, right sides together with a 1/4" seam.
Press seams to one side.
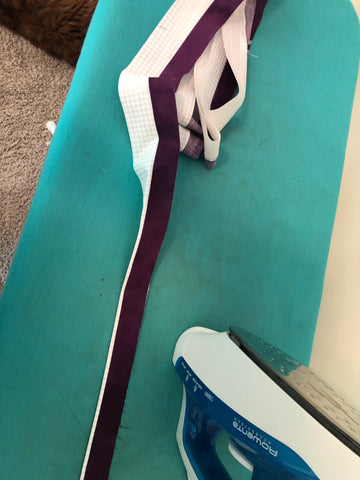
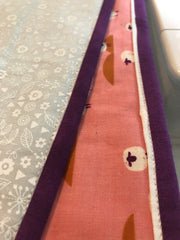
Sew the two long strips together on a long side, trying to stagger your seams so they don't end up on top of each other with a 1/4" seam, right sides together.
Iron the long seam towards the binding color (the skinnier strip).
Fold the strip in half, wrong sides together, and iron a crease down the length of the binding.
With the binding unfolded, trim the starting edge at a 45 degree angle.

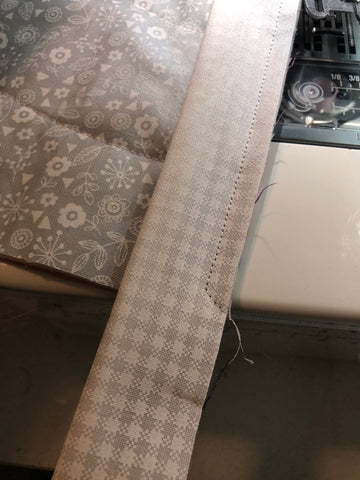
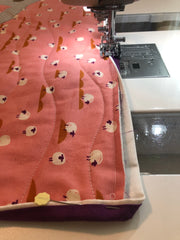
You're ready to sew your binding to the quilt. Start by sewing the binding to the BACK of the quilt, with the piping color side of the binding facing you, stitching with a 1/4" seam.
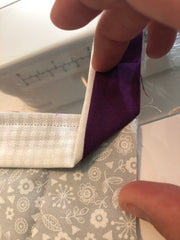
When you get to a quilt corner, stop stitching 1/4" before the edge of the quilt. Turn and stitch off of the quilt edge at a 45 degree angle, so your stitching ends at the edge of the quilt. Cut your threads.
Turn the quilt. To prepare your binding for the next side, fold the binding up, then back, with the fold even with the quilt edge (see photos below).
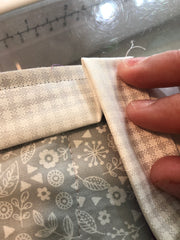
Begin stitching 1/4" in from the quilt edge, starting with a back stitch.
Join binding ends. Learn how in this video.
Turn your quilt over so you see the front side. Choose a top thread that matches your piping fabric, and choose a bobbin thread that matches your quilt backing. In this case, I am using a gray thread in the bobbin and a white thread on top.
Fold the binding from the quilt back around the edge to the quilt front. You may need to adjust your stitch so that you're sewing a little more than 1/4" from the edge for this second round of stitching. The goal is to nest your top stitches into the piping fabric, right at the seam where the binding fabric and piping fabric meet, and on the back, your stitches will fall very close to the binding edge on the quilt back, not on the binding. This may take a little patience and practice!

When you get to a corner, stop stitching about 10" away, with your needle down in the quilt. Start by folding up the next side, and securing it in place with a pin. Then, fold in the side that you're stitching on and pin. Once it's all pinned into place and looks good, continue sewing, drop your needle down at the corner, pull out your pins, pivot, and continue stitching the next side.

Here you can see our Facebook Live where we showed how to round the corner on the second side:
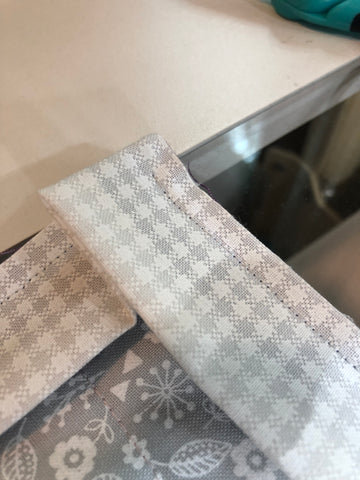
Eventually you'll make it around all 4 sides and all 4 corners, and your quilt will be done!

Flanged Binding
For a flanged binding like the one below, simply make the piping part larger: for 2 1/2" binding, cut your flange color at 1 3/4" wide and your binding color at 1 1/4" wide. The techniques are the same, but when you flip the binding strip, the flange (red fabric below) on the right side of the sample will be much wider than the piping (white below) on the left side of the sample.

Other Piped and Flanged Binding Widths
Flanged Binding
For other sizes, determine your overall cut binding width, then divide in 2. Cut your binding strip based on that number, and your flanged strip is that number plus 1/2 inch.
Example: Binding cut width of 3", cut binding 1 1/2" wide, flange color 2" wide.
Example: Binding cut width of 2 1/2", cut binding 1 1/4" wide, flange color 1 3/4" wide.
Piped Binding
For other sizes, determine your overall cut binding width, then divide in 2. Cut your binding strip based on that number plus 1/8", and your piping strip is that number plus 3/8 inch.
Example: Binding cut width of 3", cut binding 1 5/8" wide, piping color 1 7/8" wide.
Example: Binding cut width of 2 1/2" cut binding 1 3/8" wide, piping color 1 5/8" wide.
I hope you've enjoyed this tutorial and will find a way to use it on a quilt soon!